Rule
Configuration
Calendar
Menu: Administration/Measurement/Calendar
Click on ![]() to create a new calendar.
to create a new calendar.
Enter a name and click on ![]() to save.
to save.
Add some dates by clicking on ![]() in the Dates section.
in the Dates section.
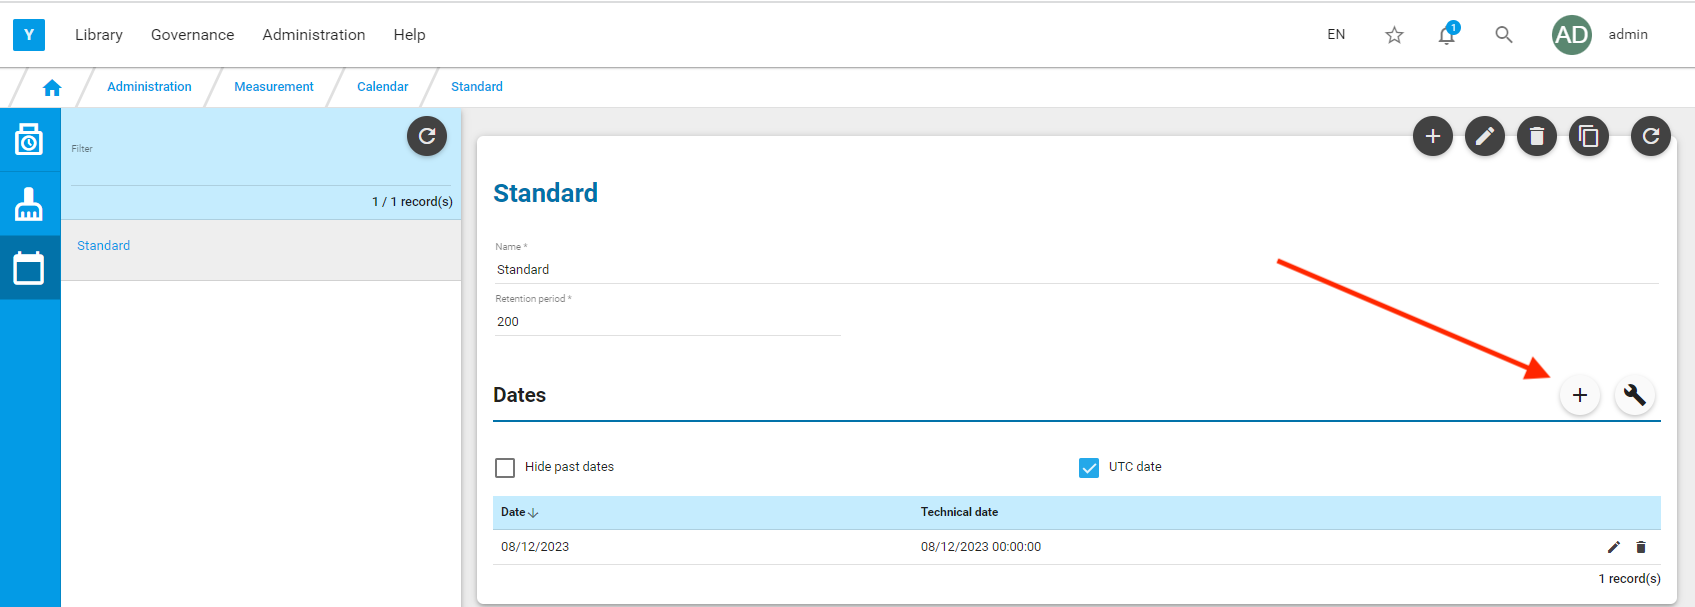
For example: in a scenario where the quality measurement will be performed every weekend, enter the next Saturday dates.
Value Driver
The goal is to measure the impact of non-quality of a rule on a value driver and then focus the correction of the defective records on those that impact the most the value driver.
Menu: Library/Rule/Value driver
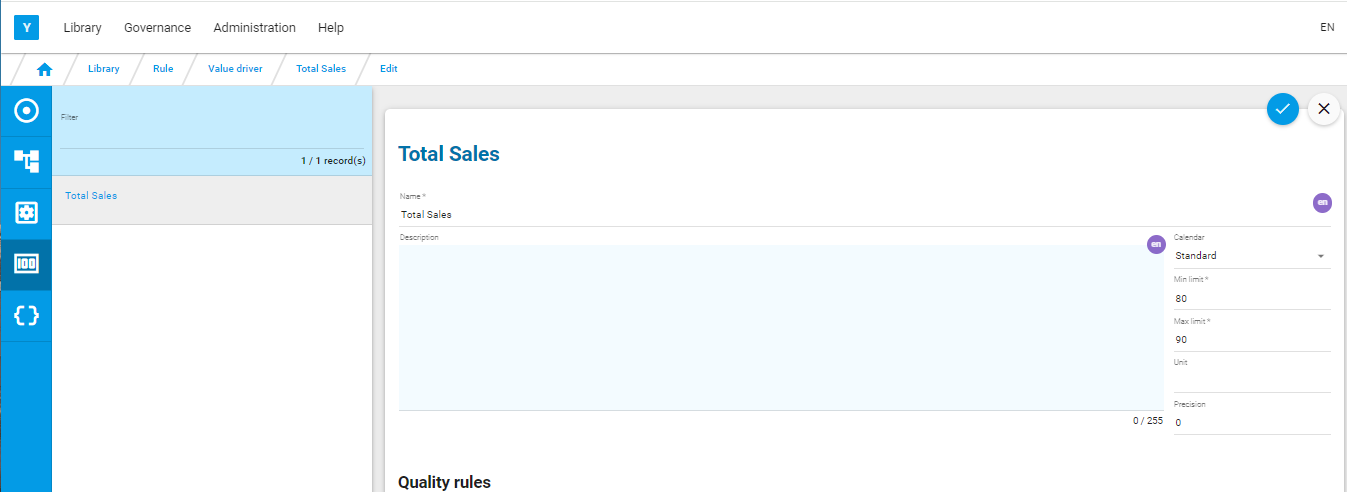
Click on ![]() to create a value driver.
Enter a name, assign a calendar and click on
to create a value driver.
Enter a name, assign a calendar and click on ![]() to save.
to save.
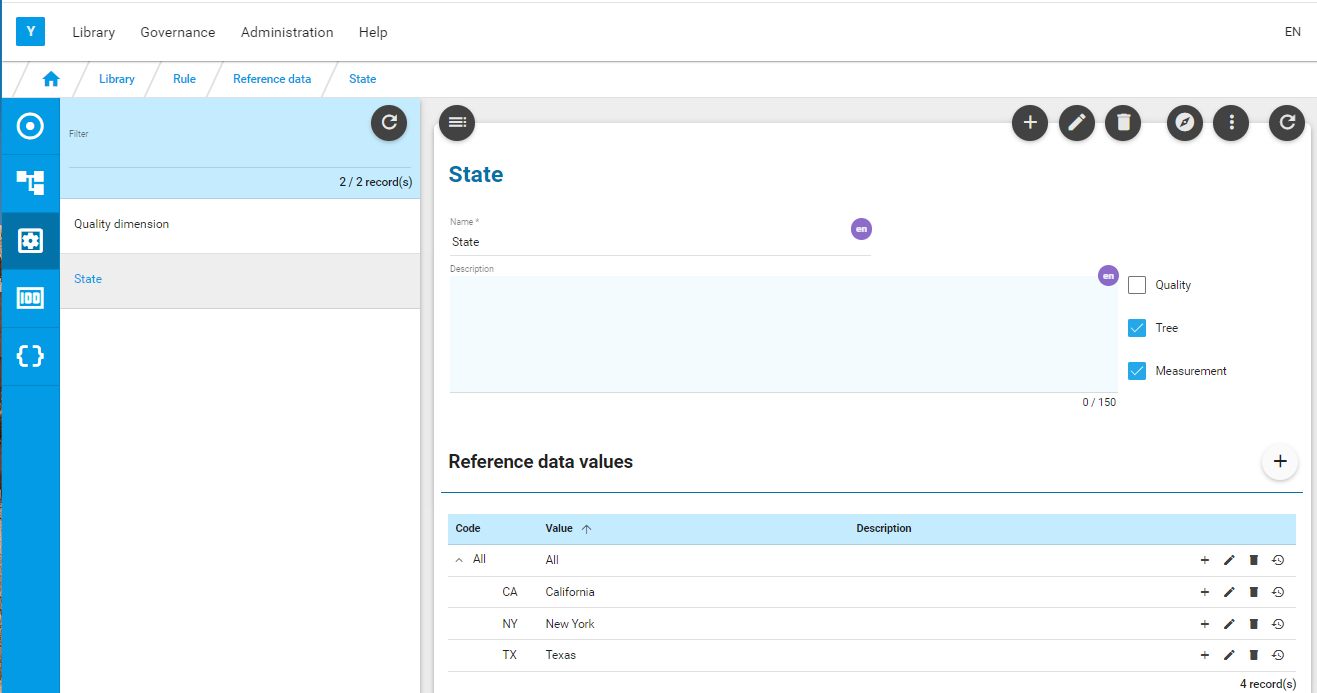
Reference data
Reference data are used to classify the rules and to design hierarchies.
Menu: Library/Rule/Reference data
Here a reference data: State has been created. It has a tree structure with level 1: ’All’ and level 2 a list of 3 states.
Rule set
Menu: Library/Rule/Rule set
Click on ![]() to create a rule set (rules are consolidated under rule sets).
to create a rule set (rules are consolidated under rule sets).
Enter a name and click on ![]() to save.
to save.
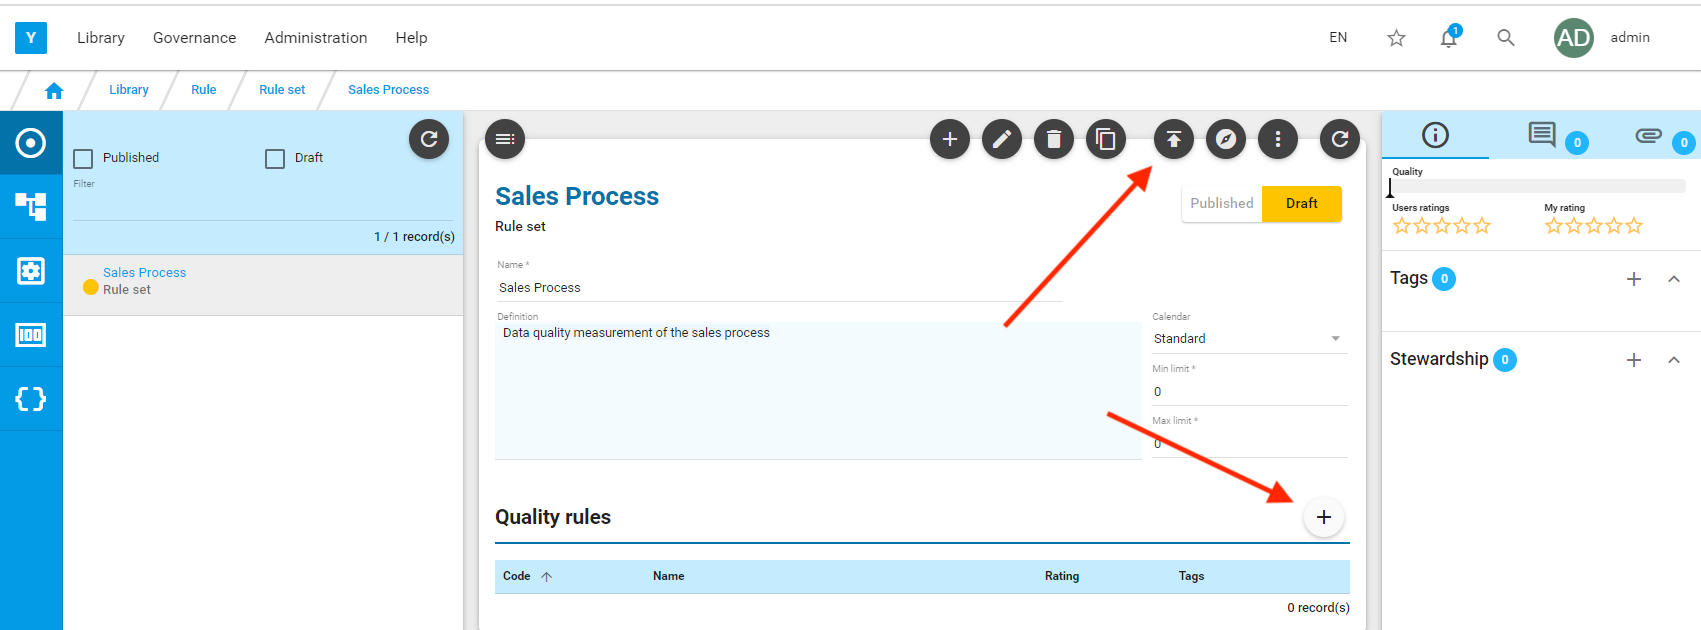
The rule set is in ‘draft’. Click on ![]() to publish it.
to publish it.
Click on ![]() in the Quality Rules section to add a rule to this rule set.
in the Quality Rules section to add a rule to this rule set.
Reminder : with Yavantha-CE, you can create only 10 rules.
Rule
Enter a code, name, description, assign a calendar, a quality dimension, a reference data and a value driver.
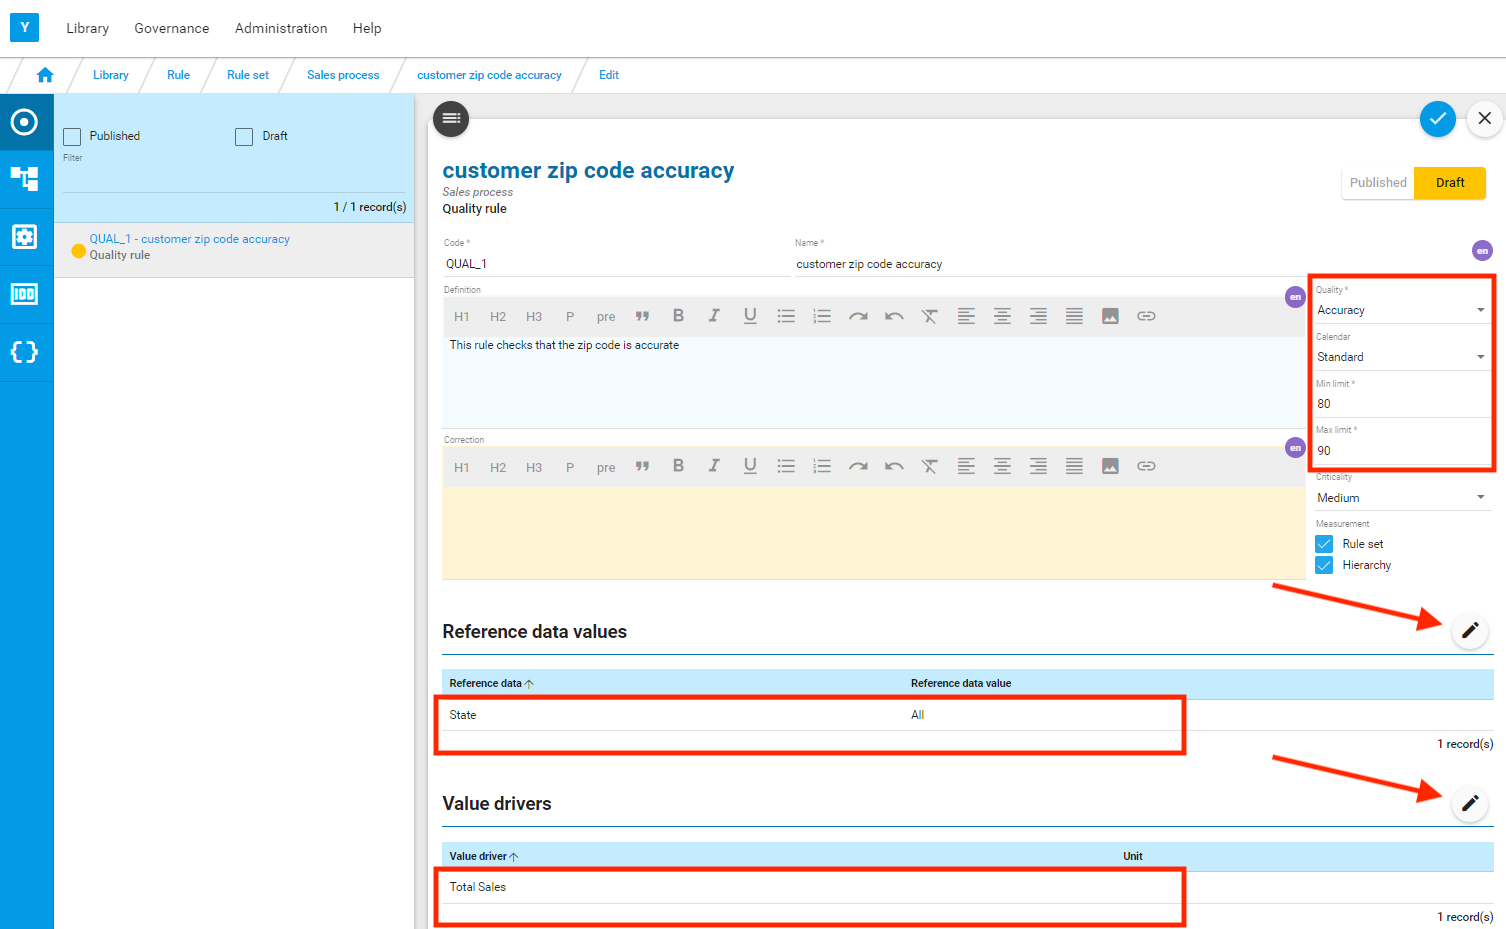
Click on ![]() to save.
to save.
Script
A script is a particular query that must contain the following three variables in the select clause:
- Variables
recordIdandsourcewhich uniquely identify each record - Variable
resultwhich flags the record as good or bad in relation to the rule
In addition:
- User can add values corresponding to the reference data assigned to the rule. The values are prefixed with
$rd - User can add values corresponding to the value drivers assigned to the rule. The values are prefixed with
$rv - User can add any other value of interest in the defect report. These values are prefixed with
$rp
Creation
A wizard is provided to facilitate the script design . Click on ![]() .
.

The first tab of the wizard is displayed, with information (name, description, reference data, value driver) extracted from the rule.
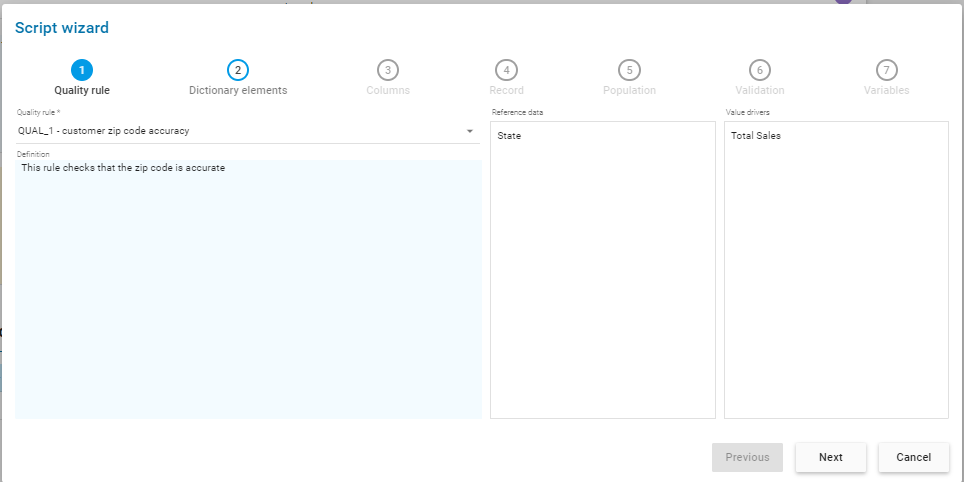
Click on Next.
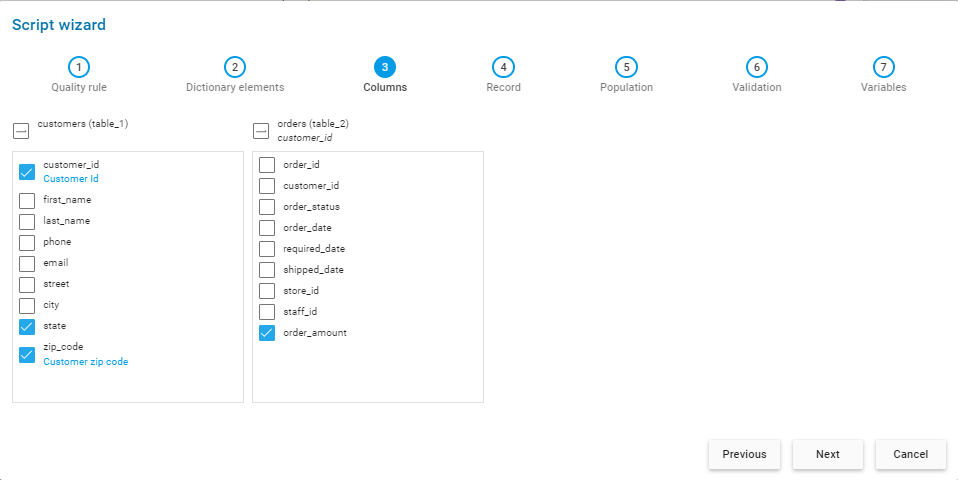
Select the main table for this rule, here BikeStores.sales.customers . All the related elements are displayed on the right. Select the one corresponding to table BikeStores.sales.orders.
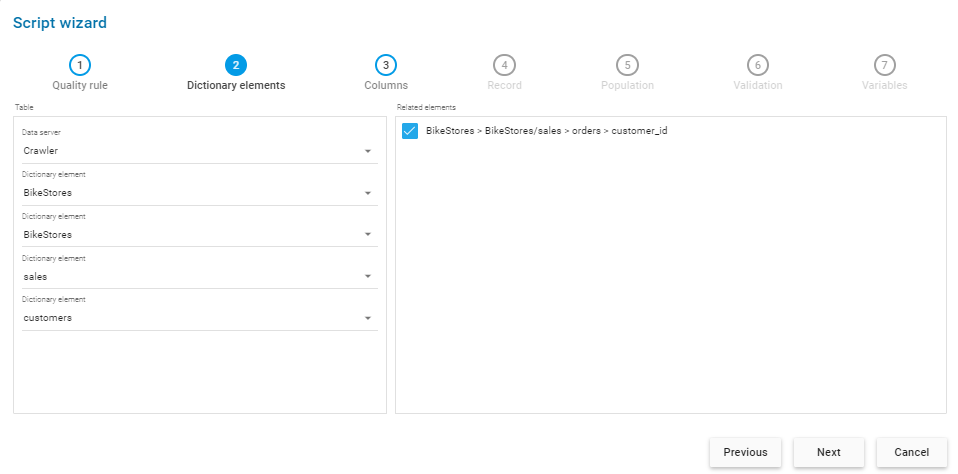
Click on Next.
Select the columns that will be used for the defect report of the rule.
Click on Next.
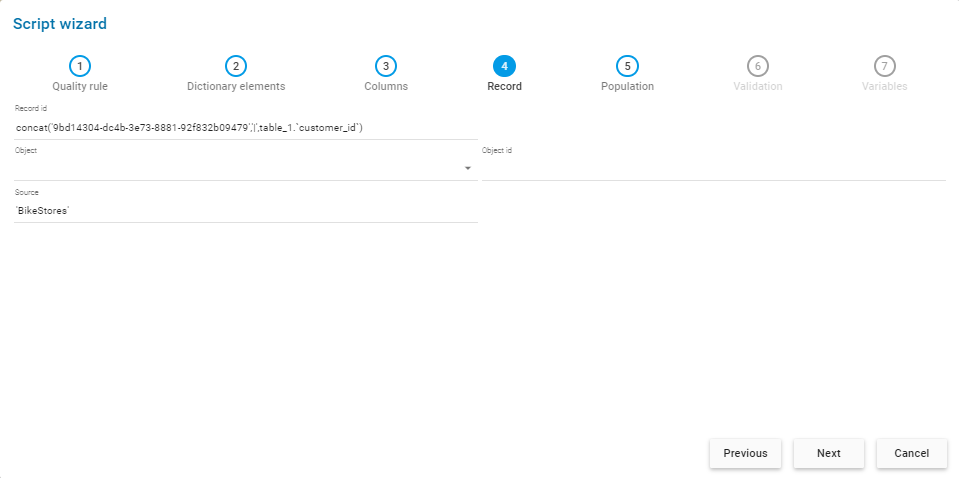
The wizard will automatically populate the variables required for the script (RecordId, Source), no action required.
Click on Next.
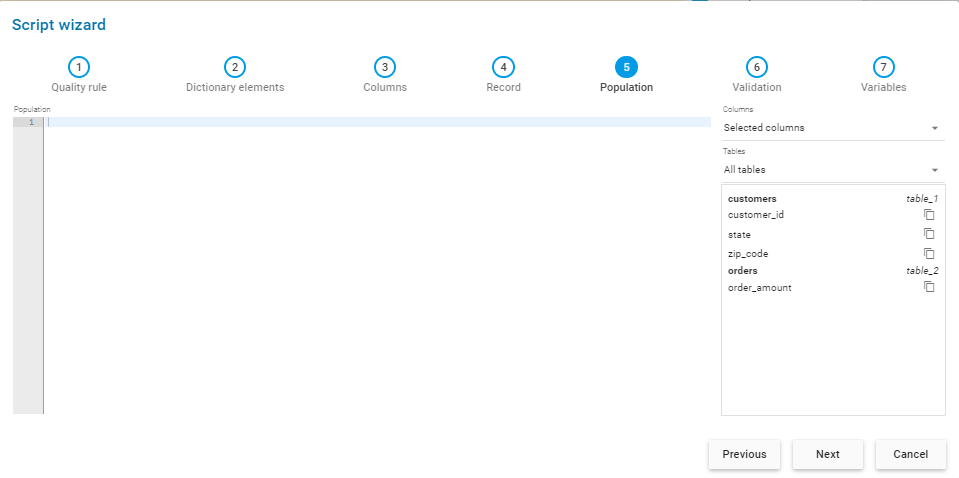
The whole BikeStores.sales.customers table is the population, so no need to specify a where clause.
Click on Next.
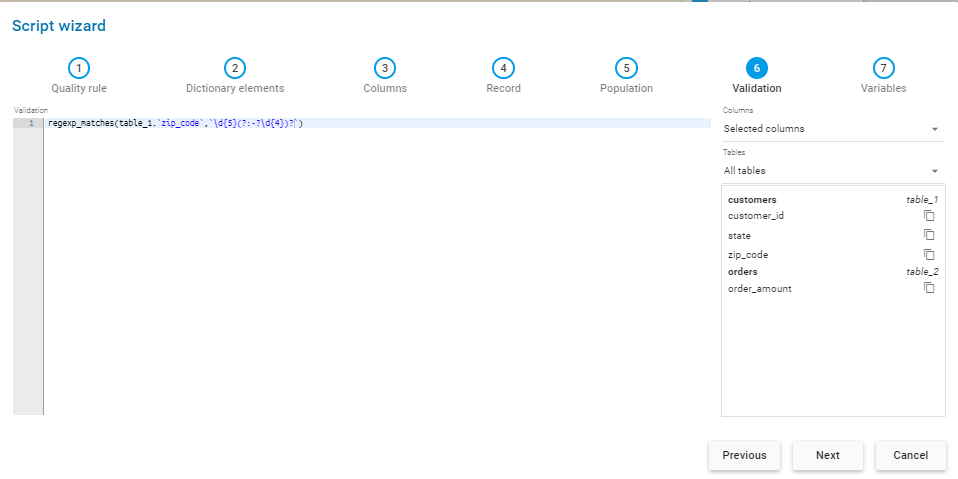
Enter the validation condition. Here it’s about checking the content of column BikeStores.sales.customers.zip code against a regex value.
Note : the validation must produce a boolean.
Click on Next.
Assign the columns corresponding:
- to the reference data (
rd$variable) assigned to the rule, - to the value driver assigned to the rule (
rv$variable) and - to the columns (
rp$variable) you want to include in the defect report
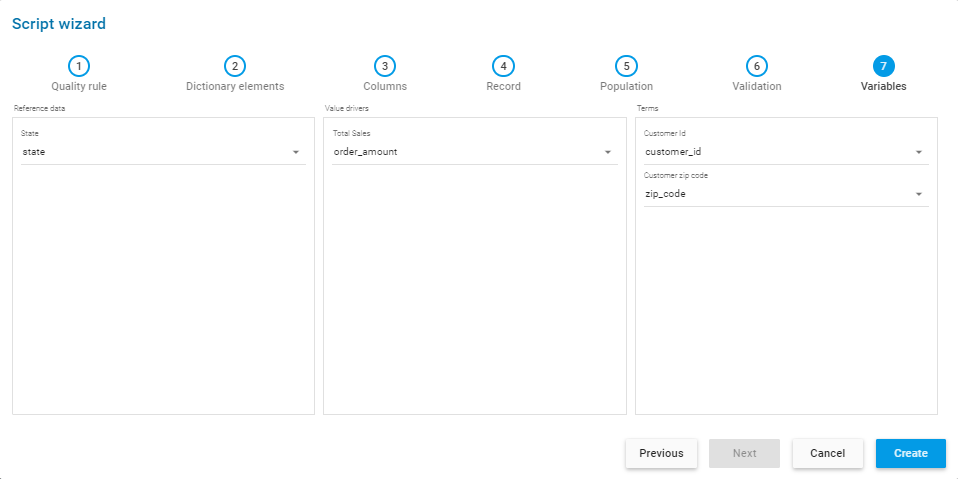
Click on Create.
The script is created (in the Menu: Library/Rule/Script) with a same name as the rule.
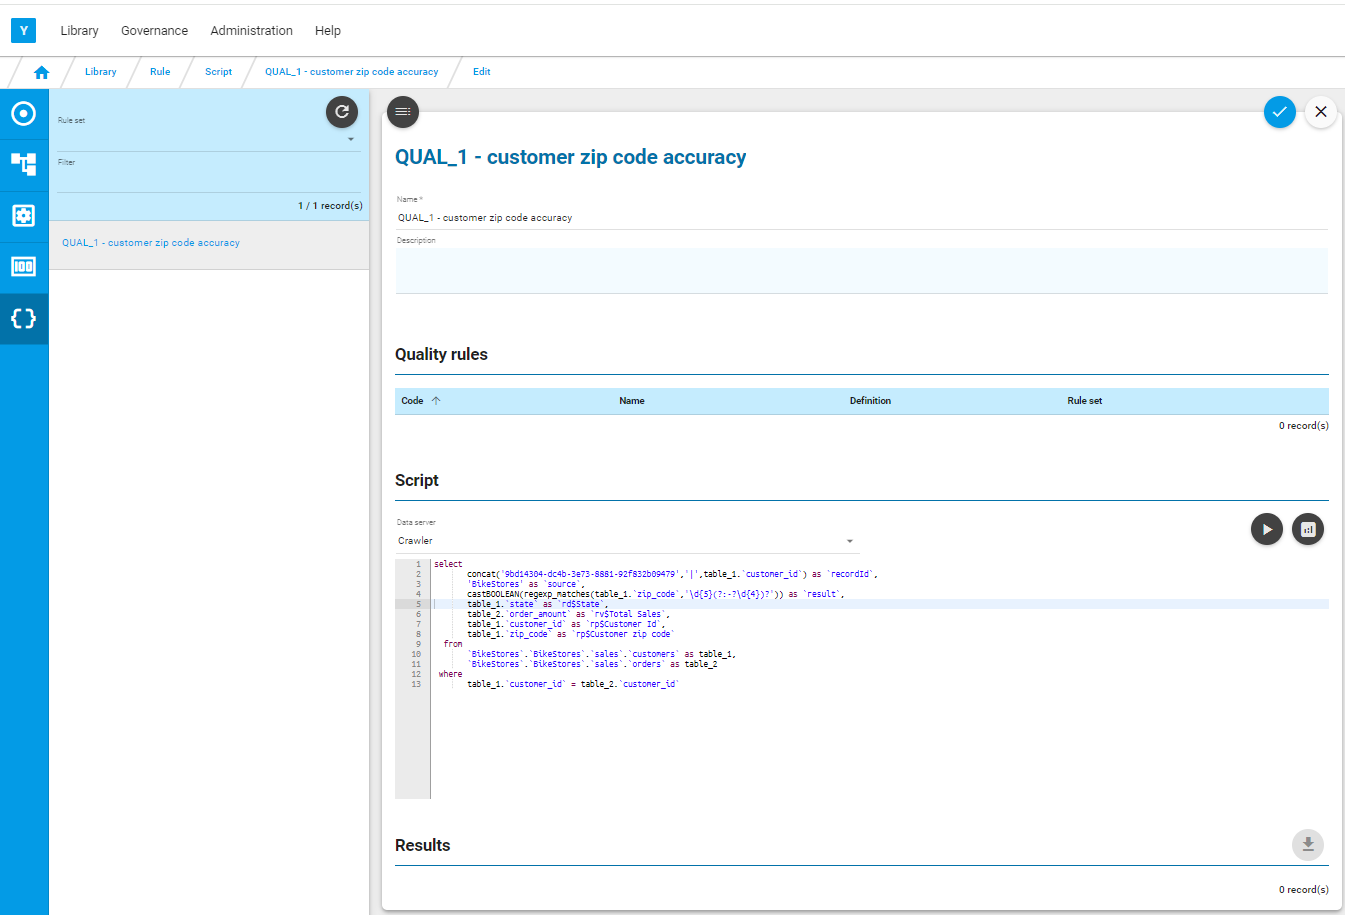
Click on ![]() to save the script.
to save the script.
You can directly execute directly via the ![]() icon. (The results are limited to 100 records).
icon. (The results are limited to 100 records).
Script association
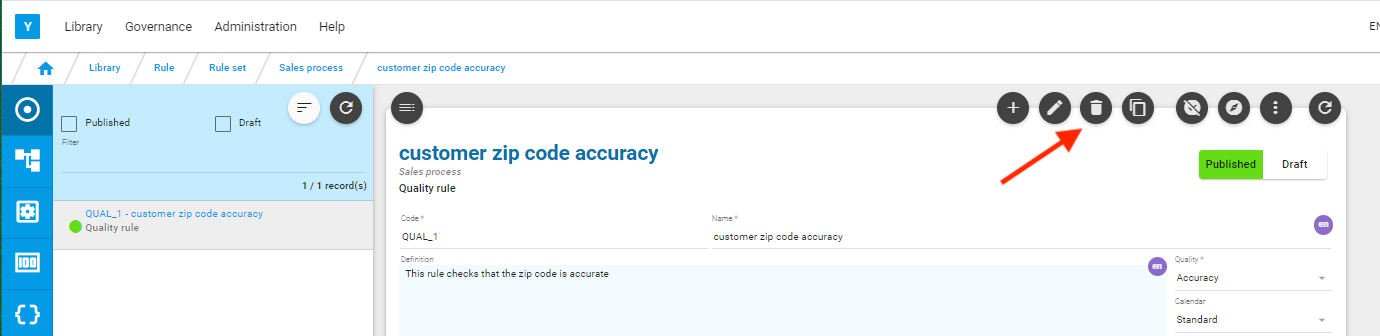
Go back to the rule.
It should be in draft status. Click on ![]() to enter edit mode.
to enter edit mode.
From the Script section, click on ![]() and associate the script.
and associate the script.
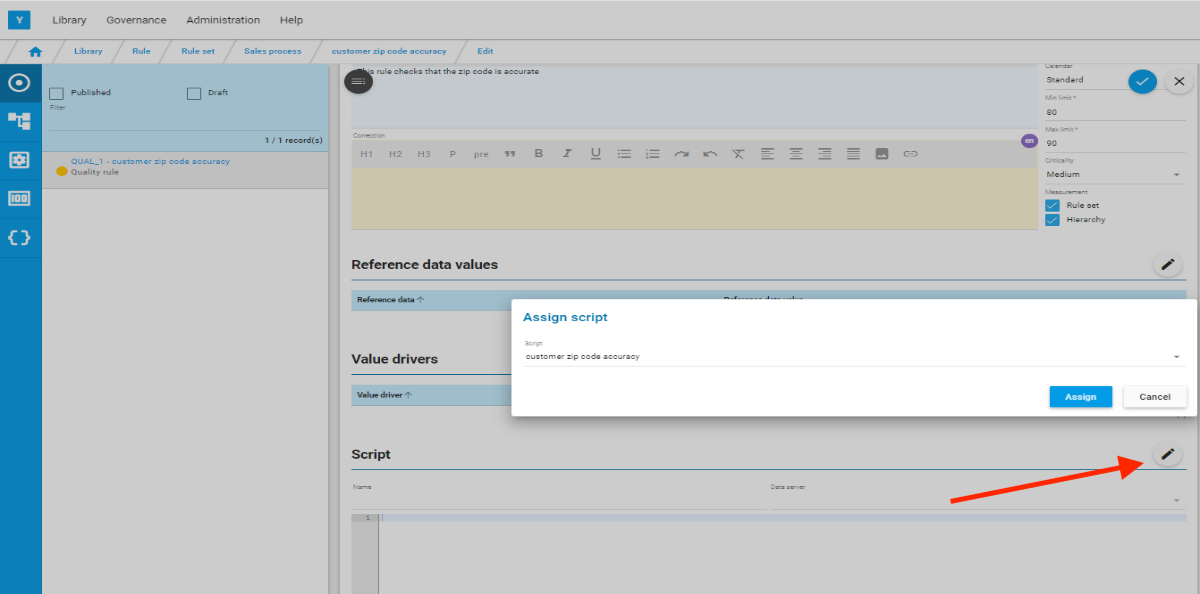
Save the rule via ![]() and publish it via
and publish it via ![]() .
.
The rule is now ready to be measured.
Measurement
Menu: Administration/Measurement/Execution
Select the earliest future calendar date displayed on the left.
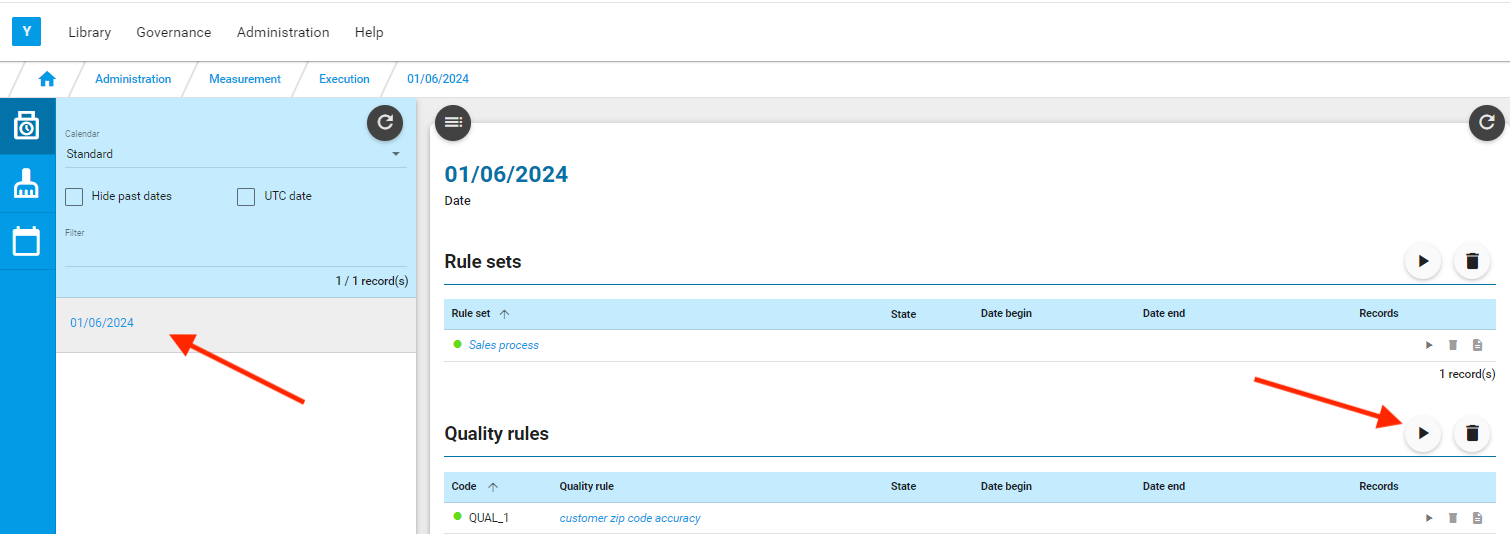
Select the rule and launch the measurement by clicking on ![]() .
.
Click on ![]() to refresh the screen.
to refresh the screen.
The measurement is completed when the end date and number of records are displayed.

In the same way launch the measurement of the rule set.
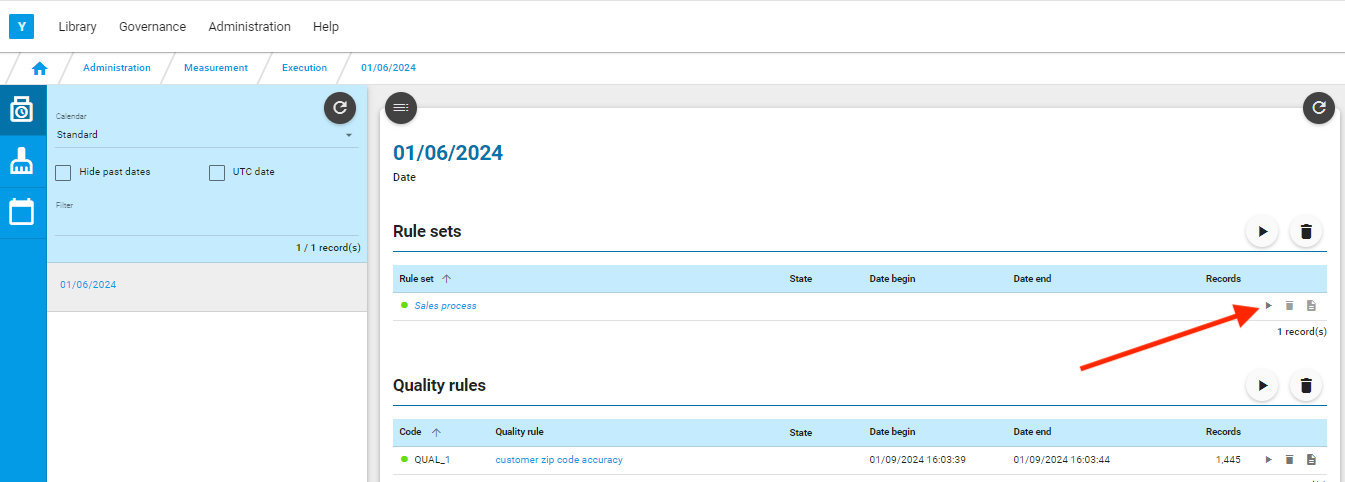
Also launch the measurement of the value driver.

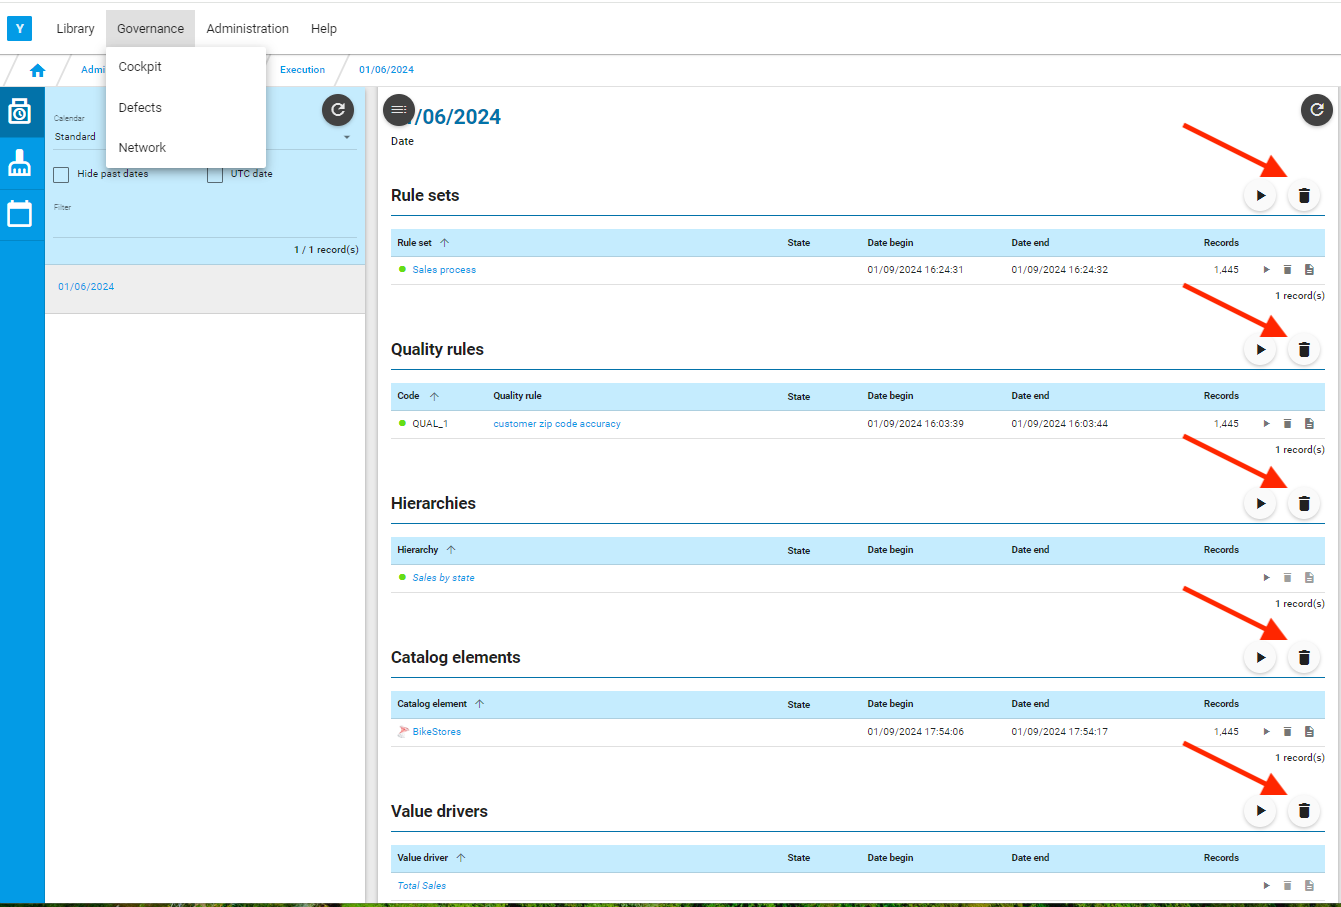
By clicking on the name of the rule set or on the name of the rule or on the name of the value driver, you are directed to the corresponding cockpit.
Rule deletion
With the Yavantha-CE’s limitation to one rule, you may have to delete the existing rule to create a new one.
If the rule has been measured, before being able to delete it
- you will need to delete the data already processed for this rule
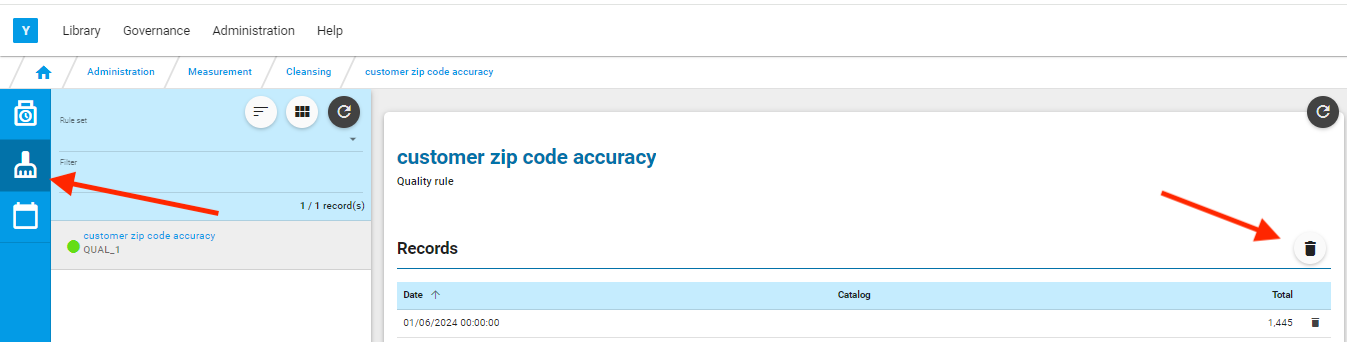
- you will need to delete all the measurement associated to this rule (sections: rule set, rule, hierarchy, value driver)
You can then delete the rule.
Hierarchy
Create Hierarchy
Menu: Library/Rule/Hierarchy
Click on ![]() to create a new hierarchy.
to create a new hierarchy.
Enter a name, description, calendar, gauge levels and click on ![]() to save.
to save.
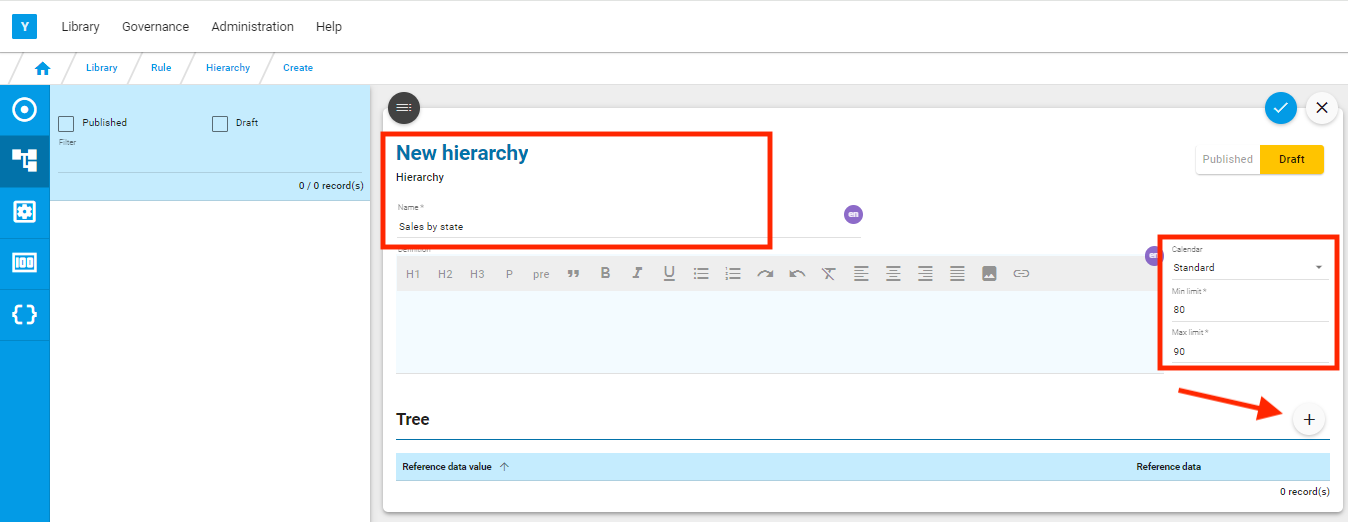
Click on ![]() to be in edit mode and on
to be in edit mode and on ![]() to start the creation of the different levels of the tree for this hierarchy.
to start the creation of the different levels of the tree for this hierarchy.
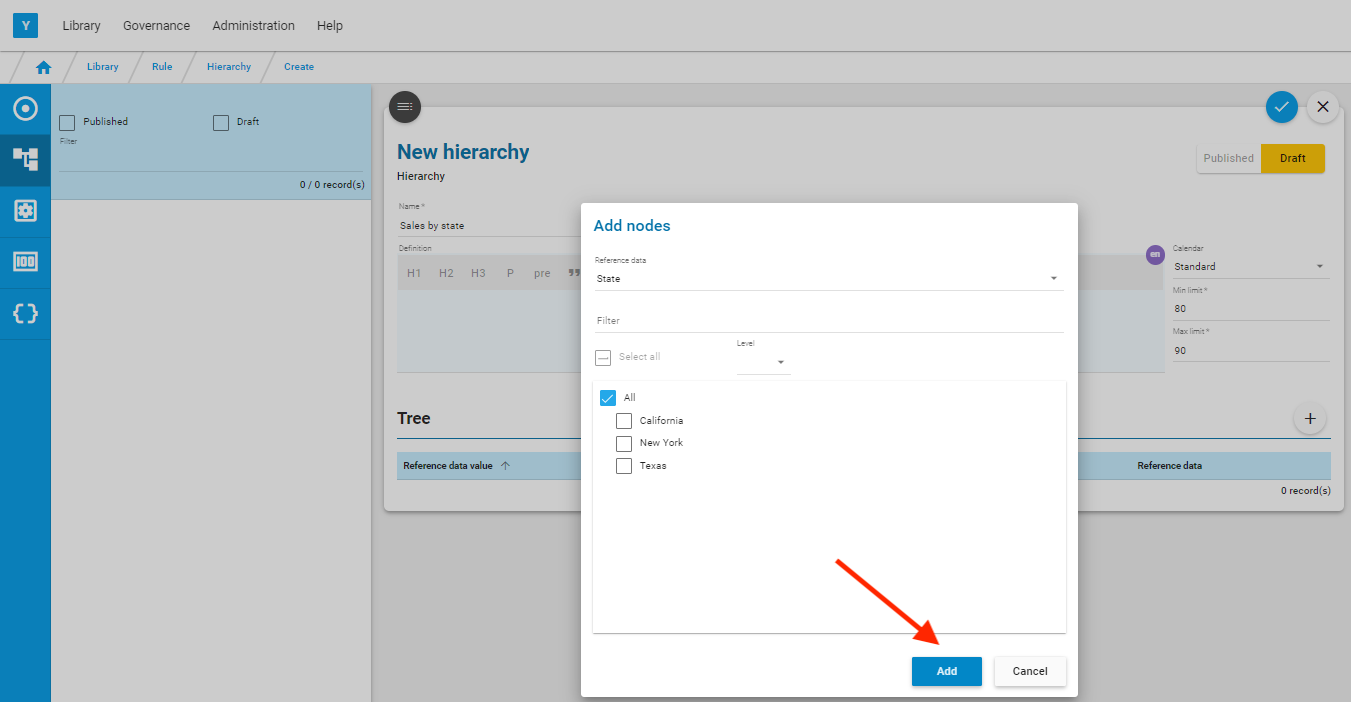
Select a reference data (Note: a tree can be built my mixing different reference data) and the root (level 0) of the tree.
Click on Add.
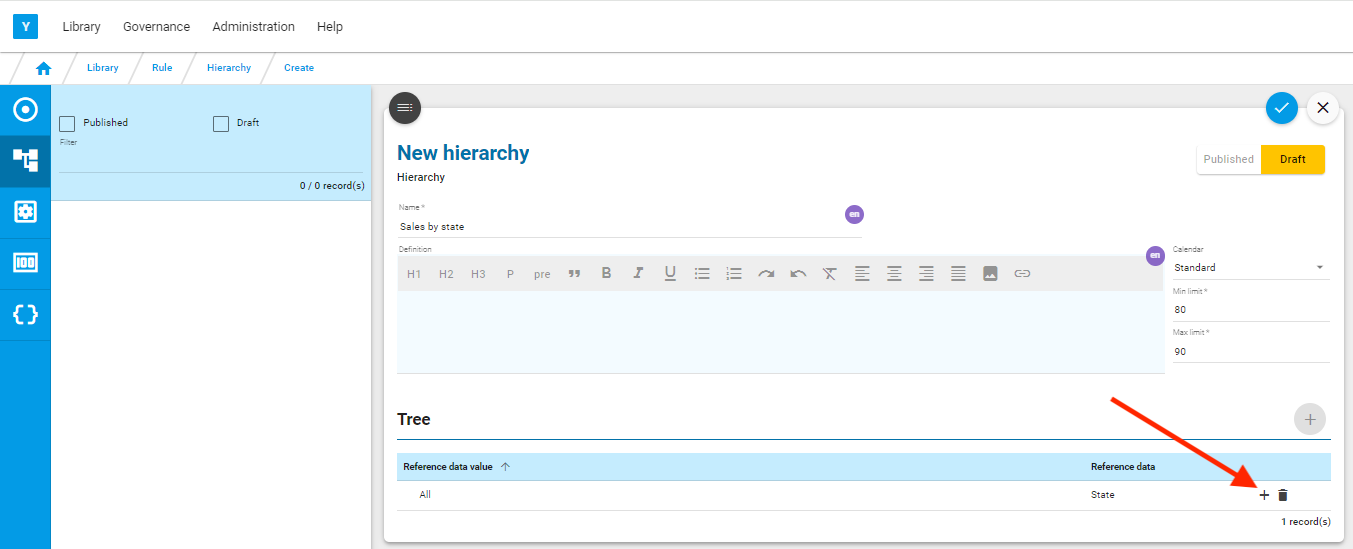
Click on the + in front of the root level that has been created.
Select the same reference data (Note: a tree can be built my mixing different reference data) and all the values for the first level of the tree.

Save the hierarchy via ![]() and publish it via
and publish it via ![]() .
.
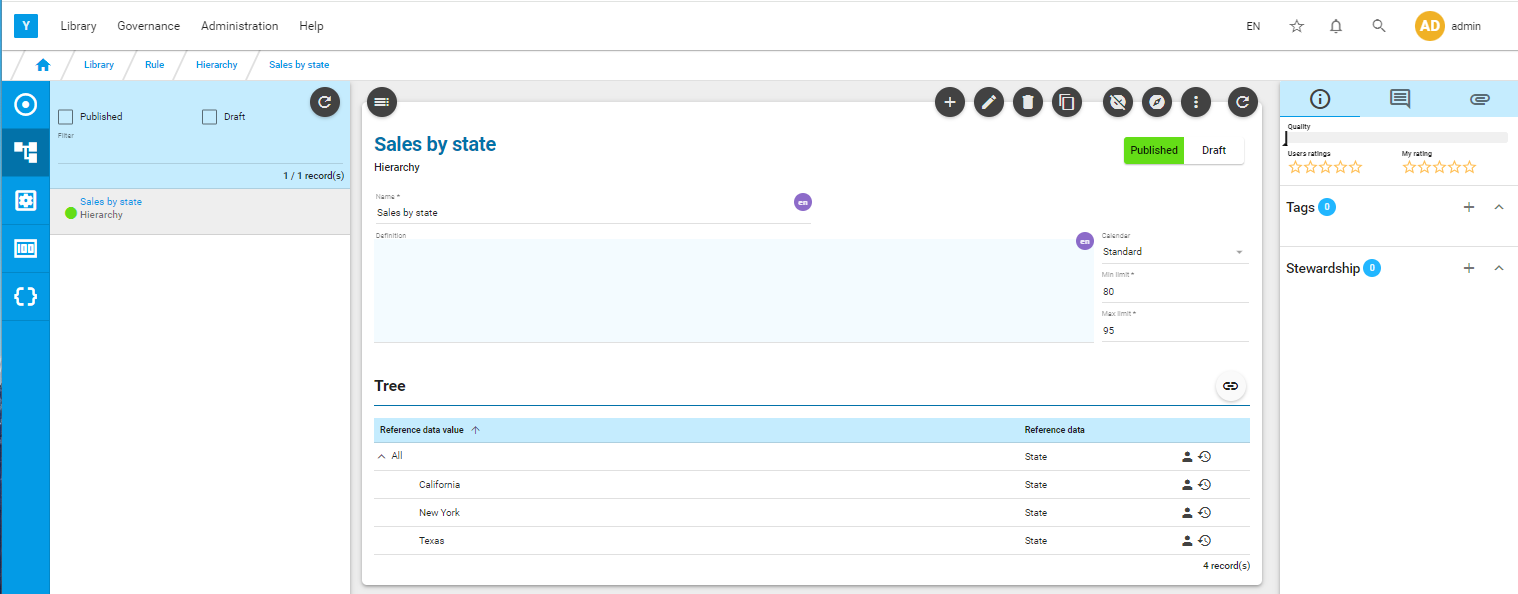
You can now measure the quality of the hierarchy
Hierarchy Measurement
Menu: Administration/Measurement/Execution
Select the earliest future calendar date displayed on the left, select the hierarchy, and click on ![]()
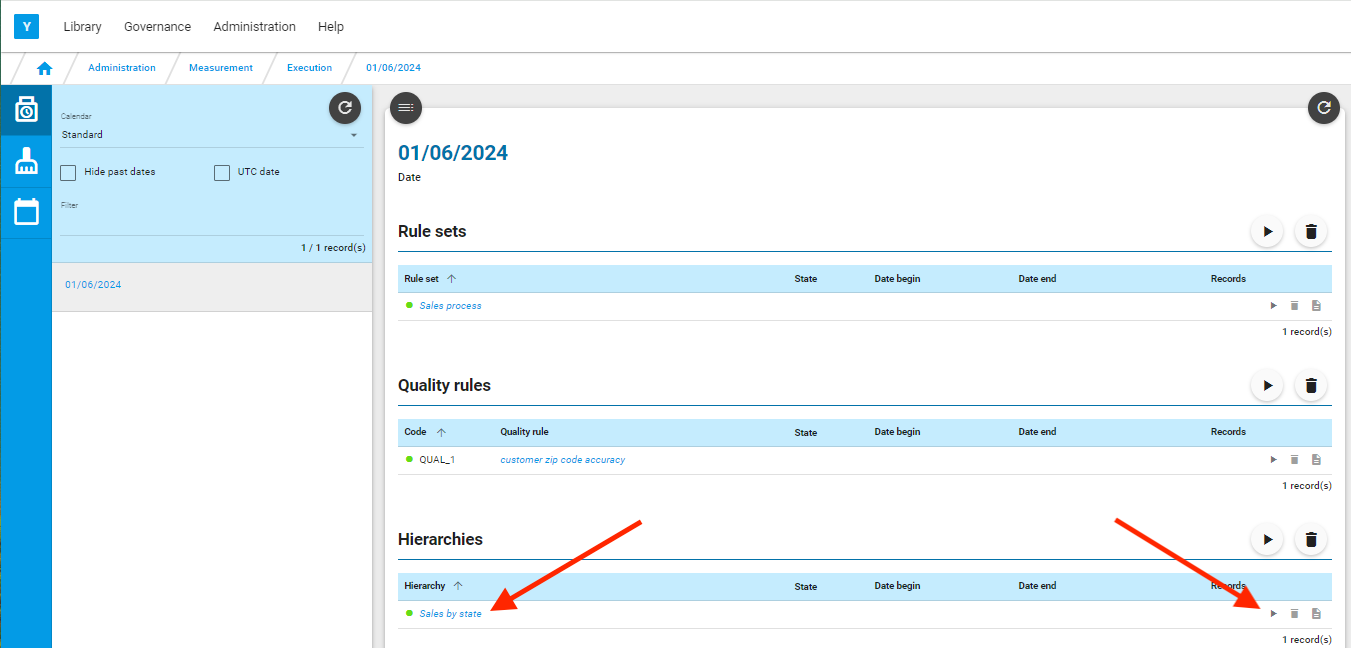
Click on ![]() to refresh the screen.
to refresh the screen.
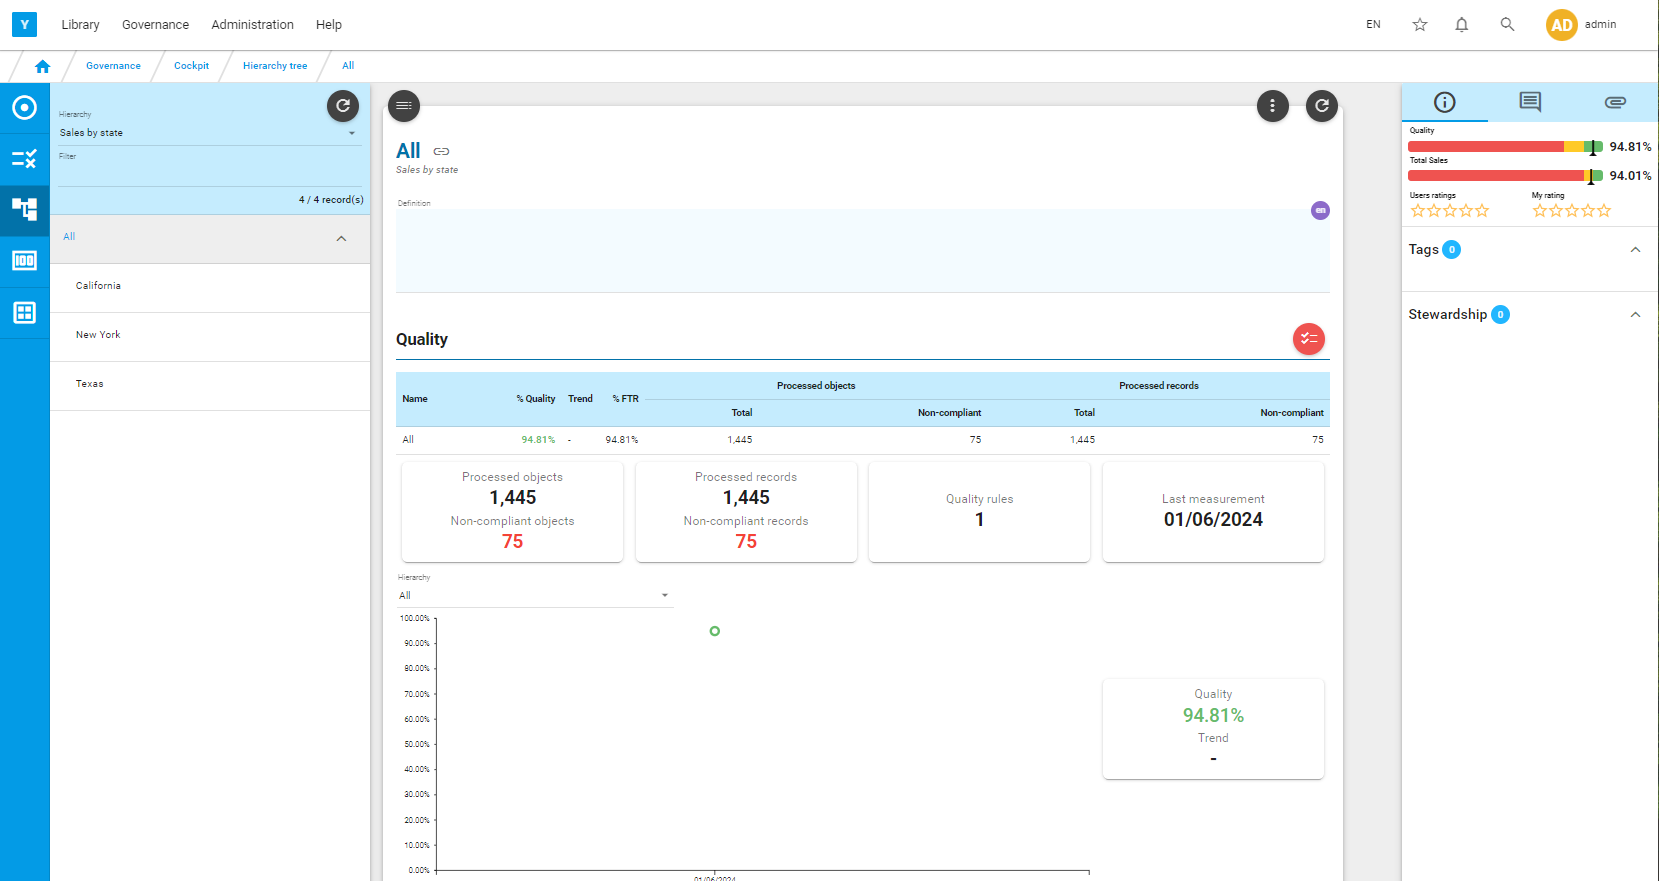
Click on the hierarchy name to be directed to the corresponding cockpit.
You can navigate to the different levels of the hierarchy displayed on the left.